

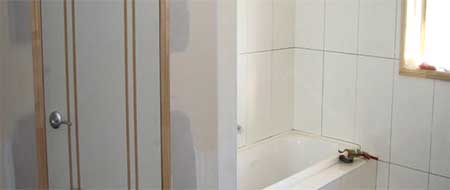
It's time to lay your hard fixed flooring such as tiling and stone. Carpet and other layover flooring such as timbers and vinyl can be done later. Tiling can of course be done yourself but most want the straightest finish possible so they opt for a professional to lay them.
One of the most interesting jobs in building a house is deciding on a colour scheme. One of the main items will be the Ceramic floor and wall tiles. When finalizing the colours for your kitchen, take some laminate samples to where you are going to purchase your tiles, and match up the splash back tiles. The person in the shop will calculate the quantity you require for all areas of the house. Pick out all the wet area tiles for the wet area rooms (bathroom, ensuite, toilet, laundry and entry floor etc), that you will require. The shop owner will let you store them there until you require them. When getting quotes from a tiler, make sure you both understand the amount of work to be completed and what you are supplying. The tiler will complete all work. The plumber will need to install floor grates before floors are laid.

Though tiling a floor might sound very mundane, it is actually a task which requires a fair deal of planning. A practice run of putting the tiles without the adhesive so that you know if you are on the right track might be a good idea. Measure the space and get an approximate idea of how many tiles you are going to need. If you are using a standard pattern of tiles, then you can skip the laying the tiles without sticking them if you wish.
Is with anything you are trying for the first time, it is best to start in an area of the house that may not be as noticeable if you make small mistakes.
We don't recommend you begin tiling in the entrance of your home which will end up being the first thing your guests will see!
A clean floor is the first requirement when laying the floor and though one cannot expect it to be squeaky clean, you will need to remove anything which can result in uneven tiling or interuption in the adhesive. Preparing the basic floor is about 20% of the entire task. The next thing to do is to create markings from where you will begin tiling. Though there are many recommendations, I would suggest you begin tiling from the most visible area of the room since the tiling needs to be the best there. Working from the centre towards the wall is oftern a good option.
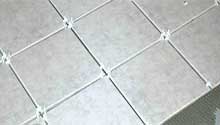
Once you have marked the position with a chalk, you can mix the concrete and start laying the tiles one by one into their end position. It pays to be patient on this task as this is a delicate part of the job. Experienced tile layers can figure out a slant with the naked eye whereas first timers may need the help of a string line to be able to see if the tile has been fixed properly. Do remember to gently level the tile as well with the help of a small machete.
Working towards the walls, the last bit of tiling involves cutting of pieces to fit in to the gaps between the last tile and the wall. Keep a correctly cut "copy tile" on top of the other and cut as required. Once the tiles are laid, try not using the flooring for a day and a half. That ensures that the levelling of the tiles remain intact. The last step includes cleaning up the floor and filling in the white cement.
Previous Step | Next Step